Easy Steps to Build a DIY Easter Egg Tree at Home
Easter egg trees blend tradition and a touch of whimsy to create festive displays that truly brighten up your home. Crafting your own Easter egg tree is a delightful way to sprinkle a bit of your own personality onto this cheerful spring centerpiece, decked out with colorful eggs and creative decorations that never fail to catch the eye.
Create your own Easter egg tree by gathering some basic budget-friendly materials like natural or artificial branches, plastic or real eggs, string or hooks, a sturdy base and handy tools such as scissors and glue.
Gathering Your Materials and Getting Your Workspace Just Right
- A sturdy branch or a trusty artificial tree to act as the backbone for hanging your eggs—something solid enough to hold those little beauties without wobbling
- Easter eggs crafted from plastic, wood, ceramic or real eggs you’ve lovingly decorated yourself
- String, fishing line or tiny hooks to hang the eggs securely—think of it as giving each egg its own safety harness
- A stable base or a pot to keep those branches or your tree standing tall and proud without tipping over
- Decorative touches like faux moss, ribbons or dainty little flowers to jazz things up and catch the eye just right
- Scissors or garden shears handy for trimming branches and snipping string—because precision counts when you want it to look neat
- And last but not least, a glue gun or some strong adhesive to firmly attach hooks and give your decorations extra staying power so they don’t wander off unexpectedly
Picking the right branches or tree base really makes or breaks how your Easter egg tree turns out. You’ll want to go for branches sturdy enough to hold a handful of eggs without drooping like they’ve had one too many drinks. Steer clear of ones that look cracked or brittle. Natural twigs bring a cozy rustic charm that’s hard to beat. Artificial trees usually keep a neat predictable shape and tend to stick around longer. Keep your space in mind — smaller branches fit perfectly on tabletops but if you want something to really catch the eye, bigger branches or a full artificial tree can do the trick.
How to Build Your Own DIY Easter Egg Tree, Step by Step (Because Who Does not Love a Little Handmade Magic?)
Snip away any pesky twigs from your branches and wipe off dirt or stray leaves to give them a neat polished look.
Pick out your Easter eggs and go wild with paint, markers or stickers—whatever floats your boat. Be sure to let those painted eggs dry completely before moving on.
Pop small hooks or tie strings through the tops of the eggs making sure each one is snug and won’t come loose when hanging.
Arrange your branches in the base or pot you’ve chosen then fill in with stones, sand or floral foam—whatever does the trick to keep things steady.
Hang the decorated eggs evenly across the branches keeping an eye on the balance so nothing tips over and the display looks just right.
Curl ribbons around the trunk add a bit of faux moss at the base or string delicate fairy lights for that extra sprinkle of charm and whimsy.
Give your branches a neat trim with garden shears or scissors. This helps shape them nicely and tidies up any stray bits that will not sit still. When it comes to painting the eggs, acrylic paints are your best bet because they offer bright vibrant colors that last long after the fun. A quick spritz of spray sealant works like a little superhero cape to protect your handiwork. Attaching hooks or string requires a good twist or knot to keep things from slipping away. You can use a hot glue gun for extra grip but be careful with your fingers since burns are no fun and not part of the plan. To keep your branches from moving in the base, choose a hefty container and add floral foam for a solid grip. Spread the eggs out evenly by size and weight to keep the tree balanced and pleasing to the eye.
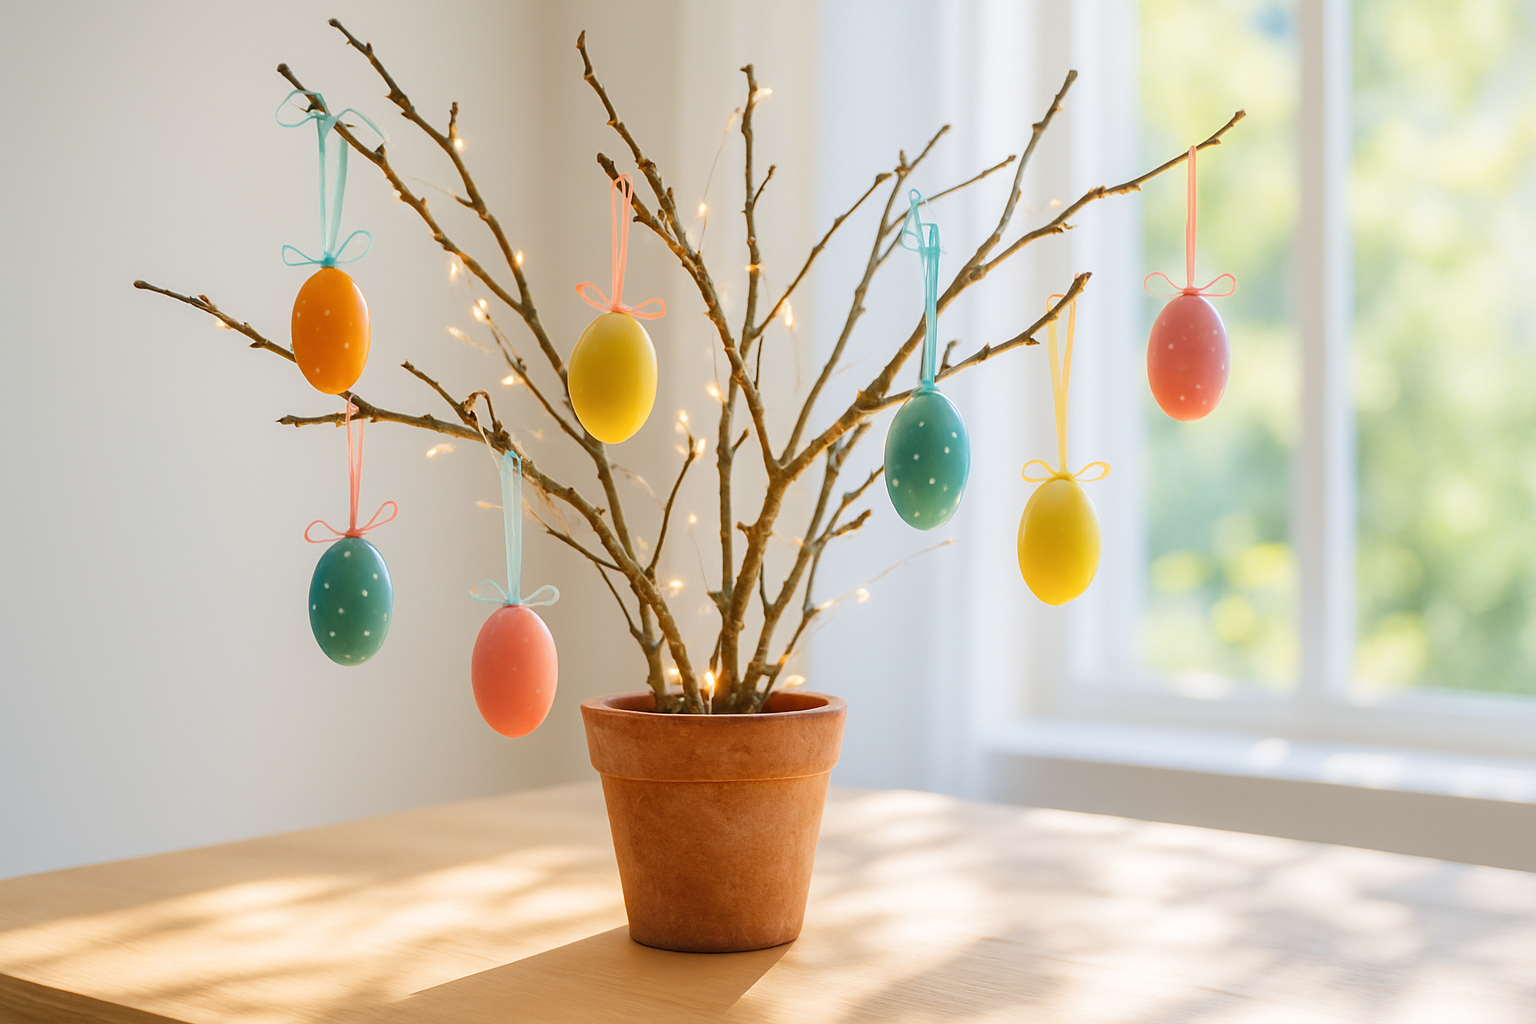
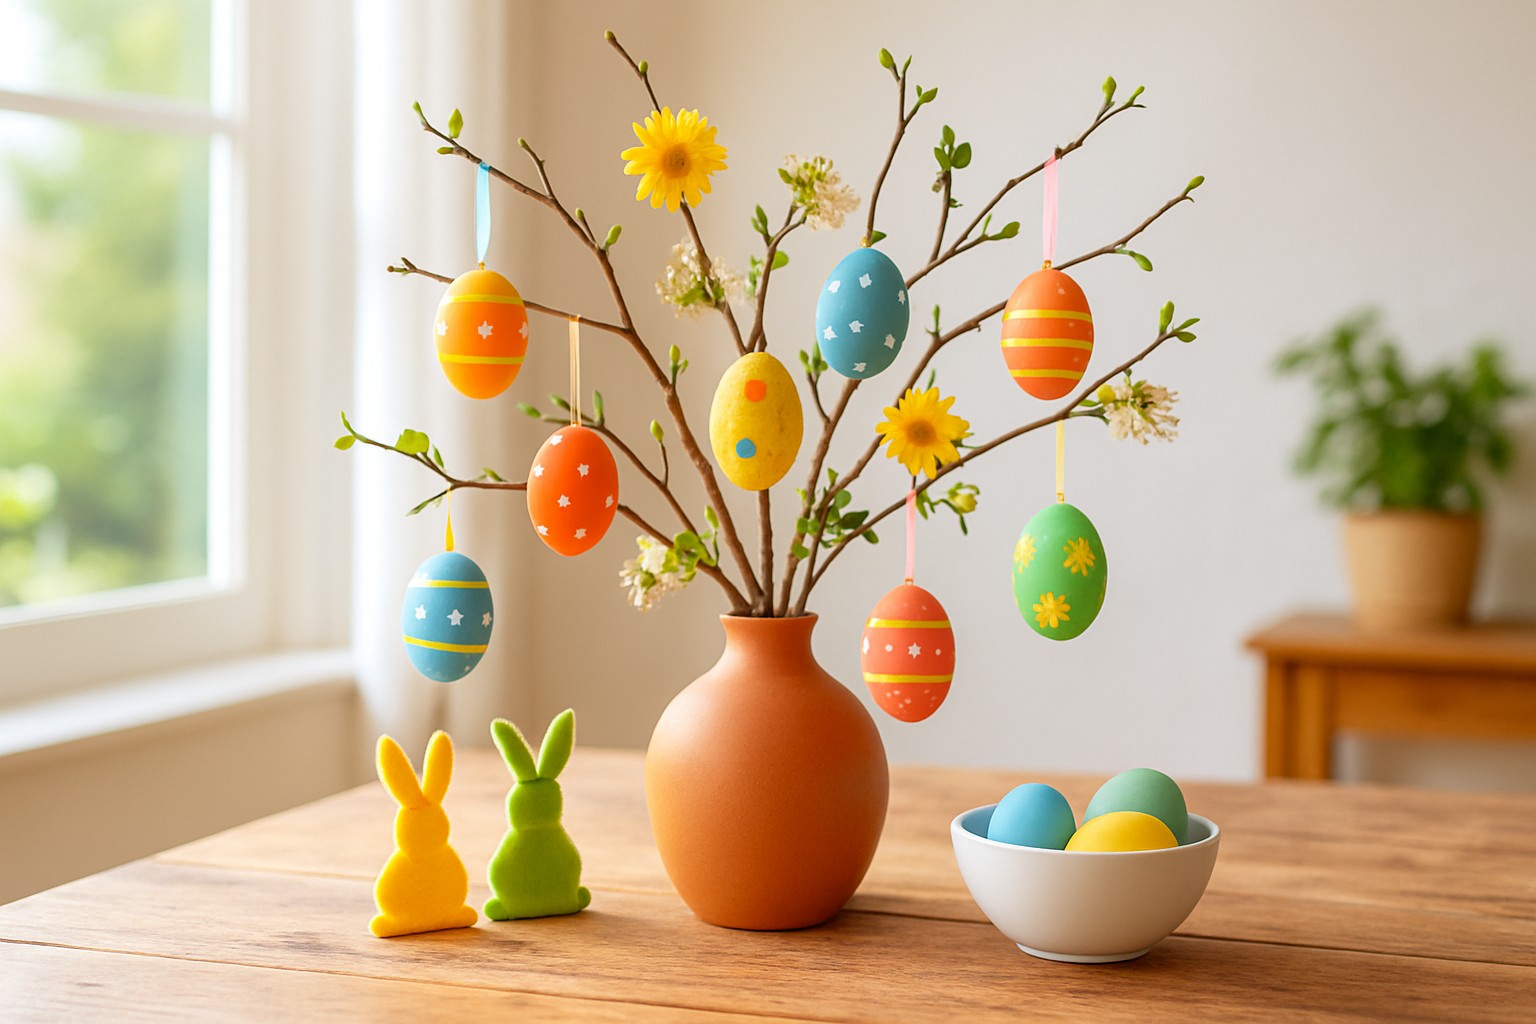
A beautifully decorated DIY Easter egg tree featuring colorful eggs hanging from natural branches, complemented by ribbons and fairy lights.
Creative Ideas and Fun Ways to Personalize Your Easter Egg Tree
- Give different egg materials a try such as wood, felt-covered or ceramic eggs to add interesting textures and extra staying power.
- Make your eggs stand out by personalizing them with family names or meaningful dates and a few hand-painted details that tell a story.
- Choose themed color palettes that match your style—whether soft pastels, shiny metallics or bold neon hues—to really bring your decor together.
- Wrap LED fairy lights around branches to create a cozy warm glow on your tree once the sun goes down.
- Bring in natural elements like fresh or faux flowers, feathers or sprigs of greenery to instantly evoke a fresh springtime feeling.
- Try using a small artificial tree instead of loose branches for an easier setup and better control of the shape. It still lets you decorate with colorful pieces while cutting down on the fuss.
When you customize your DIY Easter egg tree, it turns into a truly one-of-a-kind decor piece that perfectly captures your style and family traditions. Whether you lean towards a charming rustic vibe with natural twigs and moss or go for a sleek modern touch featuring painted eggs and twinkling LED lights, these thoughtful little details really help your festive display stand out.
Typical Challenges You Might Run Into and How to Tackle Them Like a Pro
- Make sure the base is rock solid to keep the tree from wobbling when you hang those eggs
- Secure hooks or strings on the eggs so your decorations don’t escape
- Spread decorations evenly across the branches to keep the tree balanced and looking sharp
- Pick branches that can really hold their own
- Treat fragile eggs like precious antiques especially if they’re real or ceramic because a crack or chip is a heartbreak you want to avoid
It’s best to start by beefing up your base with heavy fillers like sand or floral foam. When it comes to securing strings, double-knotting is your friend. If you want to get a bit fancy, try small metal hooks anchored with hot glue for extra peace of mind. When balancing eggs, mix heavier and lighter ones evenly to keep things steady. Avoid thin brittle branches since they’re primed to cause trouble. Instead, go for thicker well-conditioned ones. If you’re after consistency, an artificial tree could be the way to go.
How to Care for and Store Your DIY Easter Egg Tree Without Losing Your Mind
Once the Easter season wraps up, giving your DIY egg tree a little TLC goes a long way in keeping it looking sharp for years. Carefully take apart the decorations and wipe down each piece if they have dust or grime. Stash them somewhere dry and cool.
- Give the eggs a gentle once-over with a soft cloth to wipe off any dust or leftover gunk before tucking them away
- Carefully take the tree apart and set hooks and strings to the side to keep them from tangling or getting damaged
- Pick out sturdy containers with dividers or cushioned sections—these lifesavers keep fragile decorations safe
- Store the base and branches in a dry spot away from direct sunlight to help them hold their shape and stay fresh